For that we need:
-Arduino One.
-A Protoboard.
-A red LED 3mm.
-A yellow LED 3mm.
- A green LED 3mm.
Three 220Ω resistors.
-stranded To connect everything.
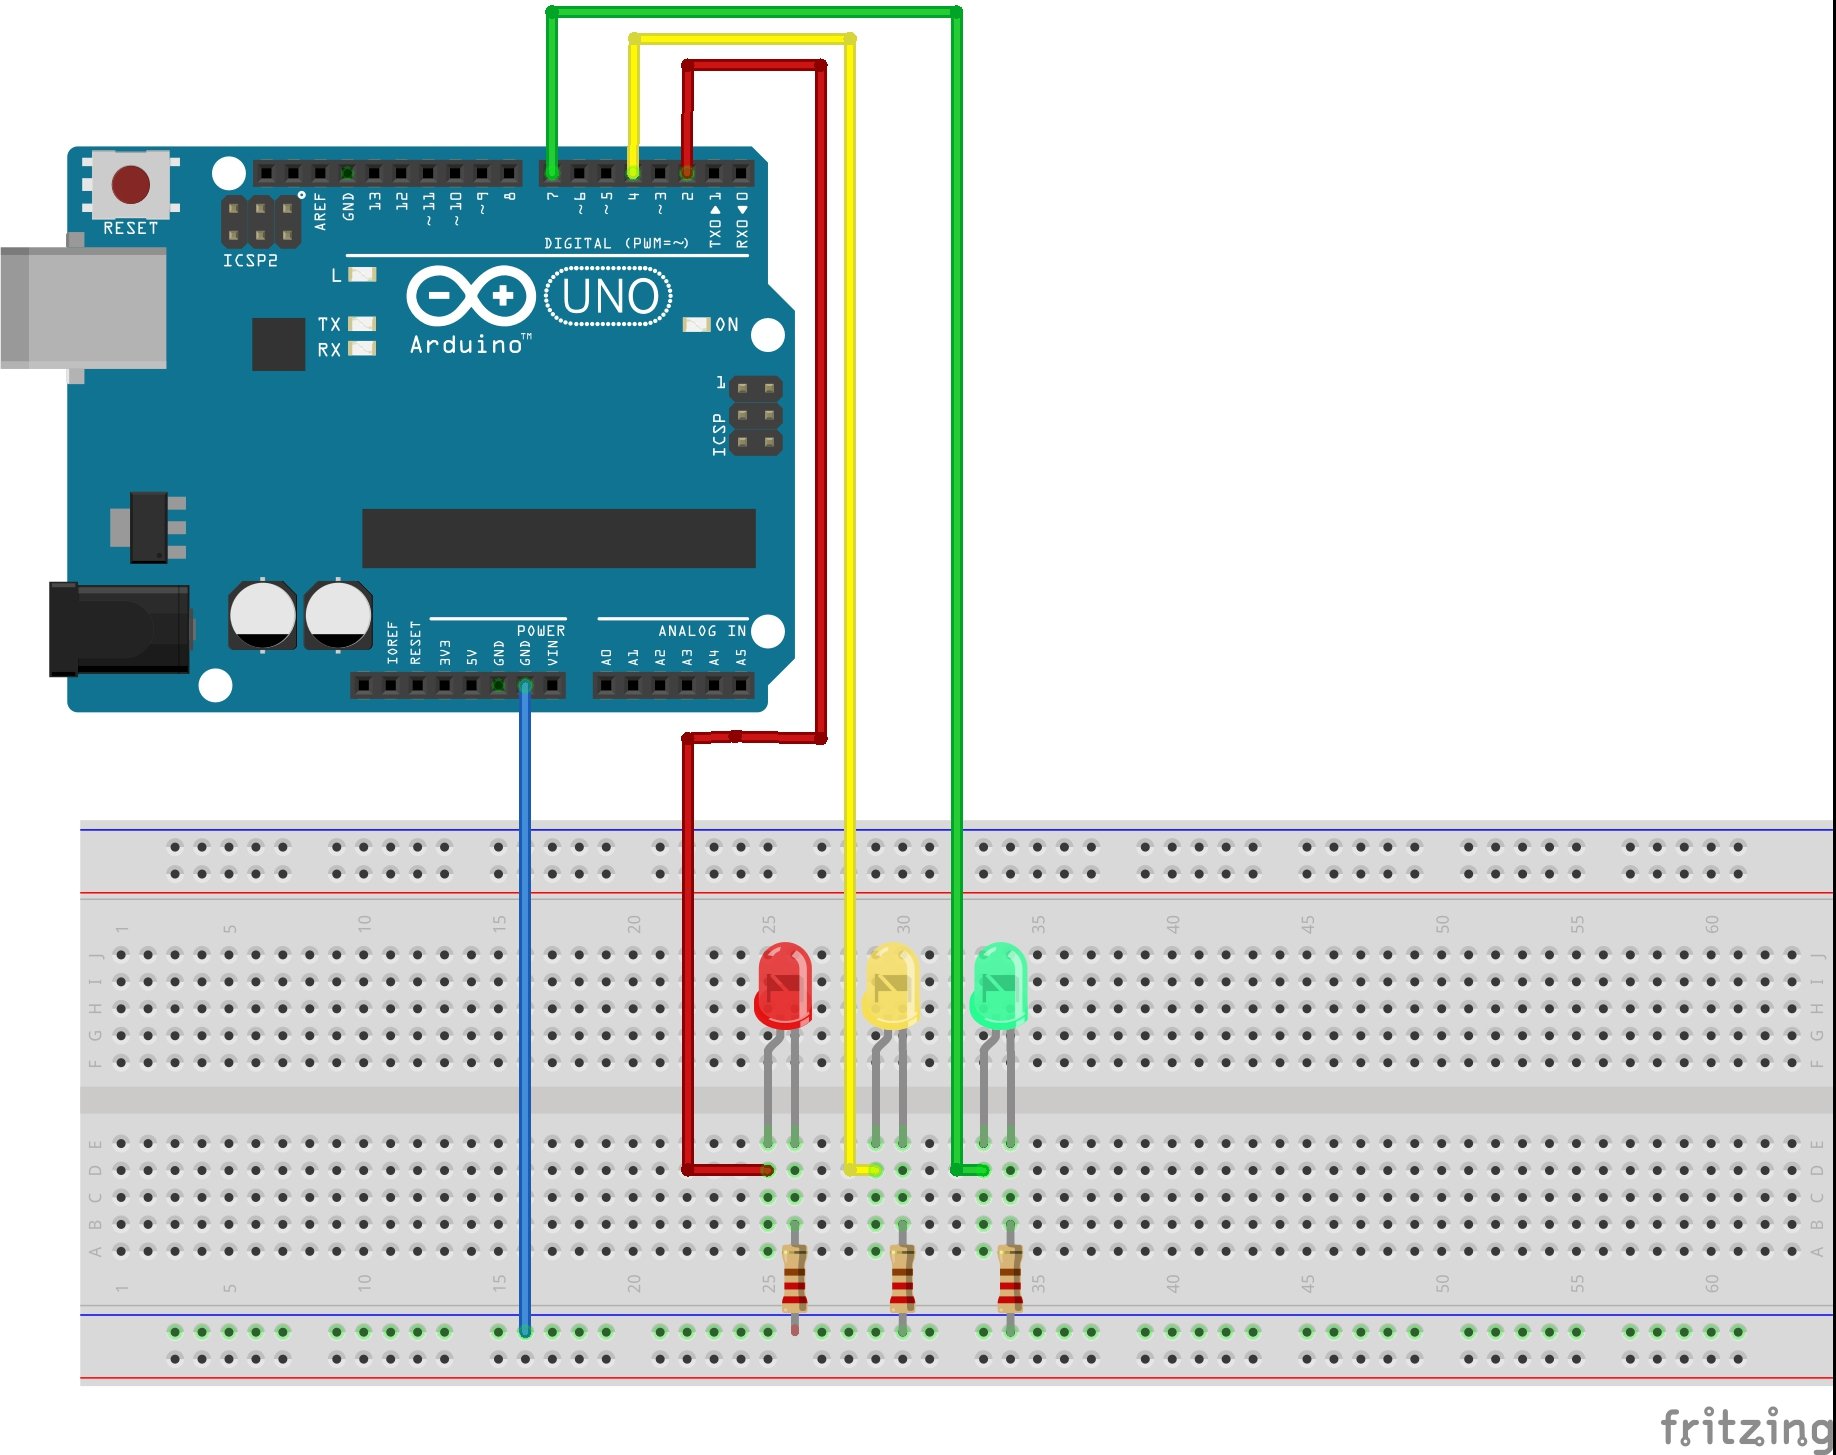
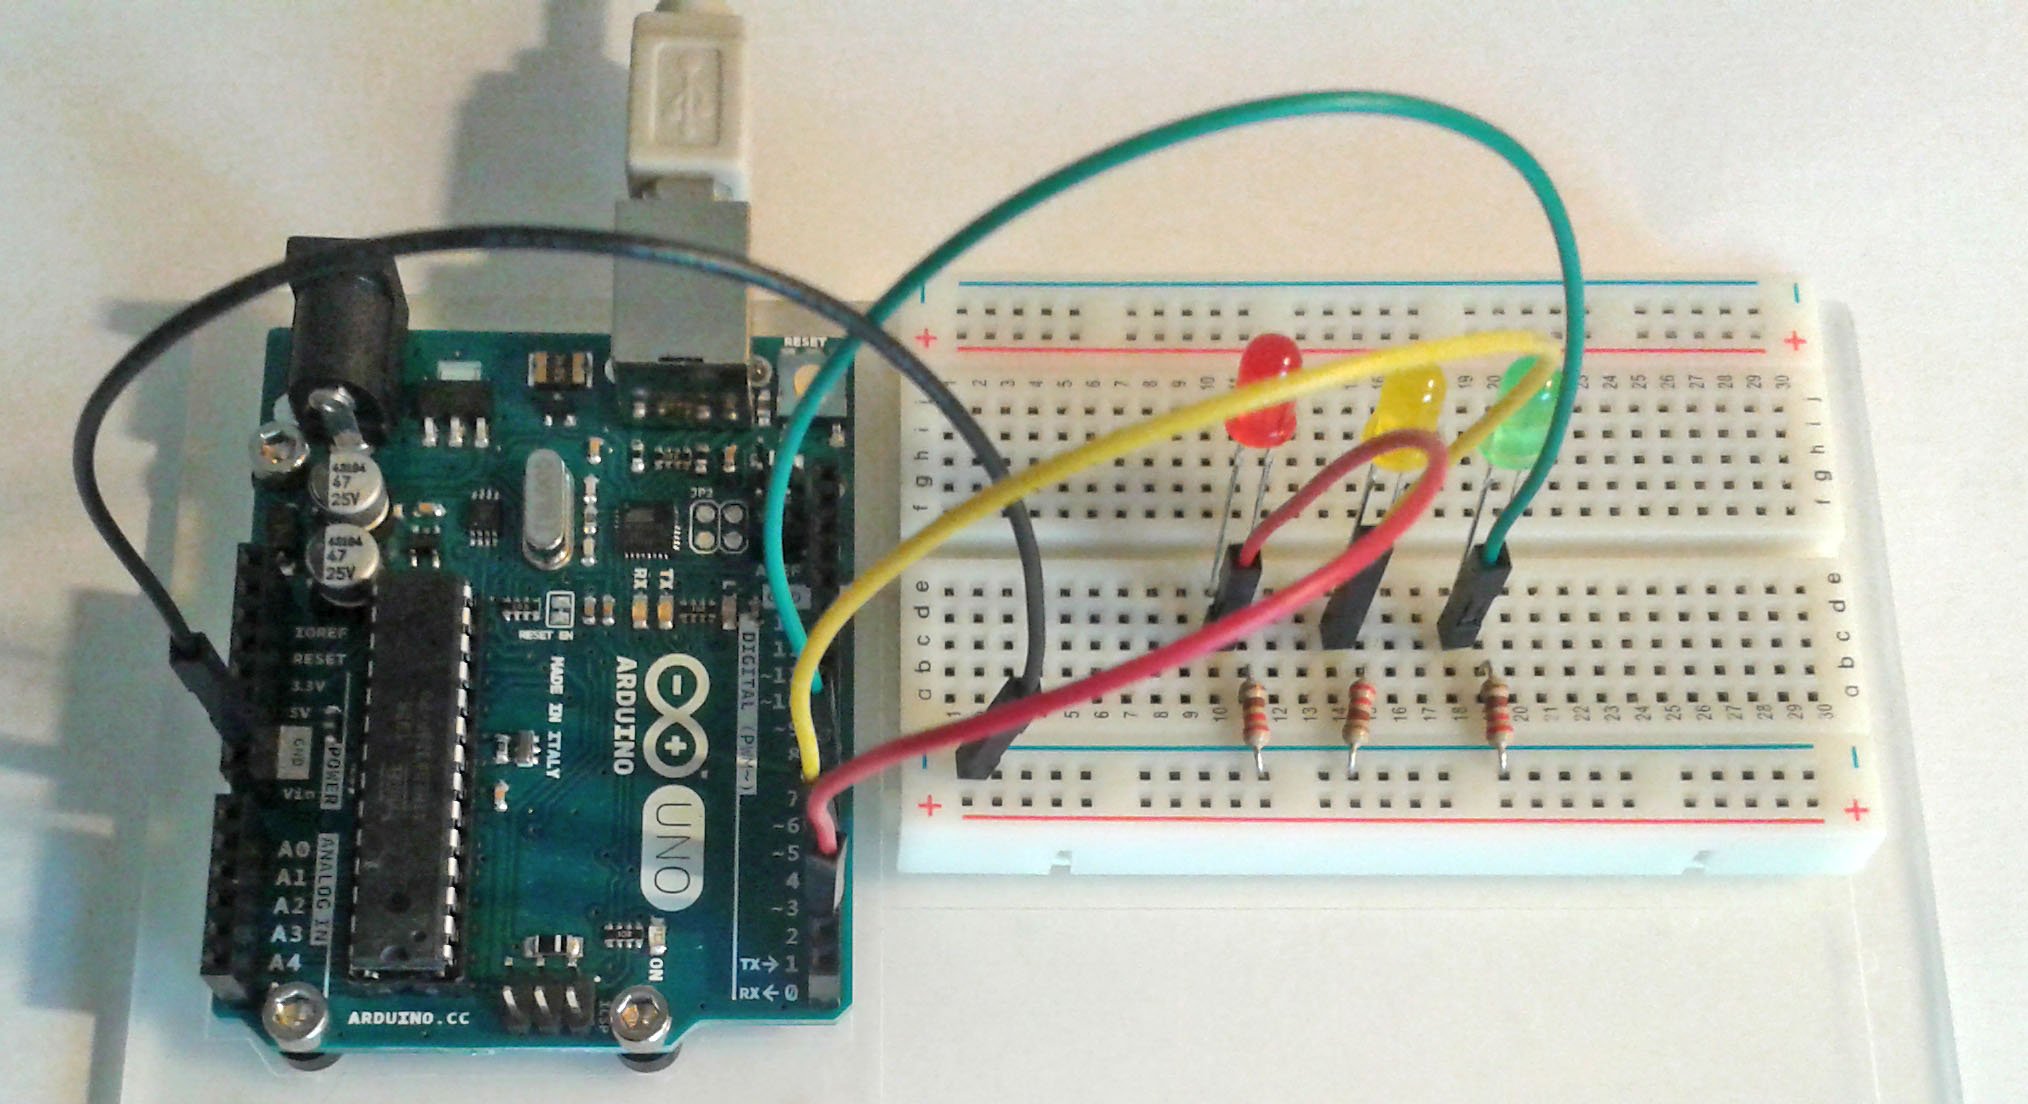
Once we have everything, we do our assembly according to the following scheme.

Use digital pins 2 (red), 4 (yellow) and 7 (green). When connecting LEDs, you must keep in mind that have polarity, so you have to put them to work well. In LEDs the short leg, or the side that is oblate, is the negative and will be connected to ground (GND on the plate) through a resistance. The long leg, or rounded side is positive and will be connected to the corresponding pin Arduino.

Once assembled, we will open our Arduino IDE and write the program.
//** Definitions **//
int red = 2; // Define the value of the pin for the red LED
int yellow = 4; // Define the value of the pin for the yellow LED
int green = 7; // Define the value of the pin for the green LED
** // ** // Program
void setup ()
{
pinMode (green, OUTPUT); // Declare the green pin output
pinMode (yellow, OUTPUT); // declare the output pin yellow
pinMode (red, OUTPUT); // Declare red pin output
}
void loop ()
{
digitalWrite (green, HIGH); // Turn on the red light
delay (2000); // Waited two seconds
digitalWrite (green, LOW); // Turn off the red LED
delay (500); // We expect second half
digitalWrite (yellow, HIGH); // Light the yellow LED
delay (2000); // Waited two seconds
digitalWrite (yellow, LOW); // Turn off the yellow LED
delay (500); // We expect second half
digitalWrite (red, HIGH); // Turn on the green LED
delay (2000); // Waited two seconds
digitalWrite (red, LOW); // Turn off the green LED
delay (500); // We expect second half
}
With the ruling int we are declaring an integer numeric variable, so that it can use later in our code.
The delay command causes the program to stop a certain time. This will define, in milliseconds, within parentheses.
The pinMode and digitalWrite functions will be explained in the next post, outings, with detail.
I hope ye fun with this post and start out to get him the bug to the Arduino world.
https://www.dropbox.com/s/4smz48bakilepqd/Semforo_con_Arduino_Prctica_para_secundaria%28bajaryoutube.com%29.mp4?dl=0
Health and Republic.
No hay comentarios:
Publicar un comentario